Have a new GH5, GH6 or GH7? Here’s some quick tips: 5 simple and easy things that should help familiarize yourself with settings on the camera and get up-and-running as quickly as possible.
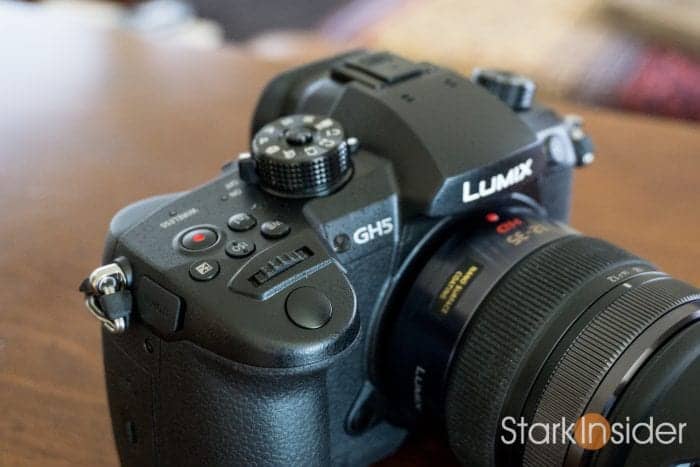
If you’re a camera enthusiast, and especially a videographer, I suspect it would be an impossibility, but just in case: the Panasonic Lumix GH5 mirrorless camera looks to be one of the best new releases in years. Early reviews are generally positive. And it seems to be selling very well (atop the charts at Amazon and B&H Photo).
Recently I posted my first impressions of the GH5 coming at the camera as a lifelong Canon DSLR video shooter.
I’ve been shooting video for Stark Insider here for about ten years. Mostly Canon DSLR. That could be changing soon based on my experience the past few weeks with the GH5.
Especially impressive (and there’s a lot of good stuff in the GH5 to talk about) is the 5-axis IBIS (in-body image stabilization). It works very well, and doesn’t result in Jello or distorted images. This means you can handhold cinema lenses (Rokinon, for example) and get very good results. Admittedly it’s hard to avoid hyperbole, but this is the stuff of dreams.
Also, rolling shutter is minimal on the GH5. And, as for the image? I’m pleased to report that, in my tests at least, it’s not video-ish as I was fearing it might be. Rather it’s, dare I even use that term often used to describe Blackmagic/RED/Arri footage, “organic”. Sure, it’s not going to outperform higher end, dedicated cinema cameras, but for the money Panasonic has hit a homerun.
https://twitter.com/panasonic/status/852491733074149376
So, here’s a few quick tips for new GH5 buyers and for those who are still wanting to learn about the camera before making a purchase.
Panasonic Lumix GH5/GH6/GH7 Video Shooting Guide:
5 quick tips and tricks
1. Hold DISP to display information on menu items


Yes, the GH5 has a vast array of options and settings. It can be confusing. By my count there’s 16 pages across 5 sub-menus (not including the user-customizable menu).
To make things easier, here’s a hidden trick:
- push the “DISP” button (on back right) while hovering over a menu item
Holding it will display a brief explanation of whatever setting you’re hovering over. Granted, some of these are more helpful than others. When in doubt you may need to Google a bit, or, better still, tackle the operating manuals (at least once).
BTW – even after shooting all these years with Canon, Sony and RED, I was overwhelmed at first by the menus. The GH5 is a mighty little beast. Take your time. After a few days, you should feel more comfortable. My guess is that within a week or so you’ll be right at home with all it can do — and love will surely be in the air.
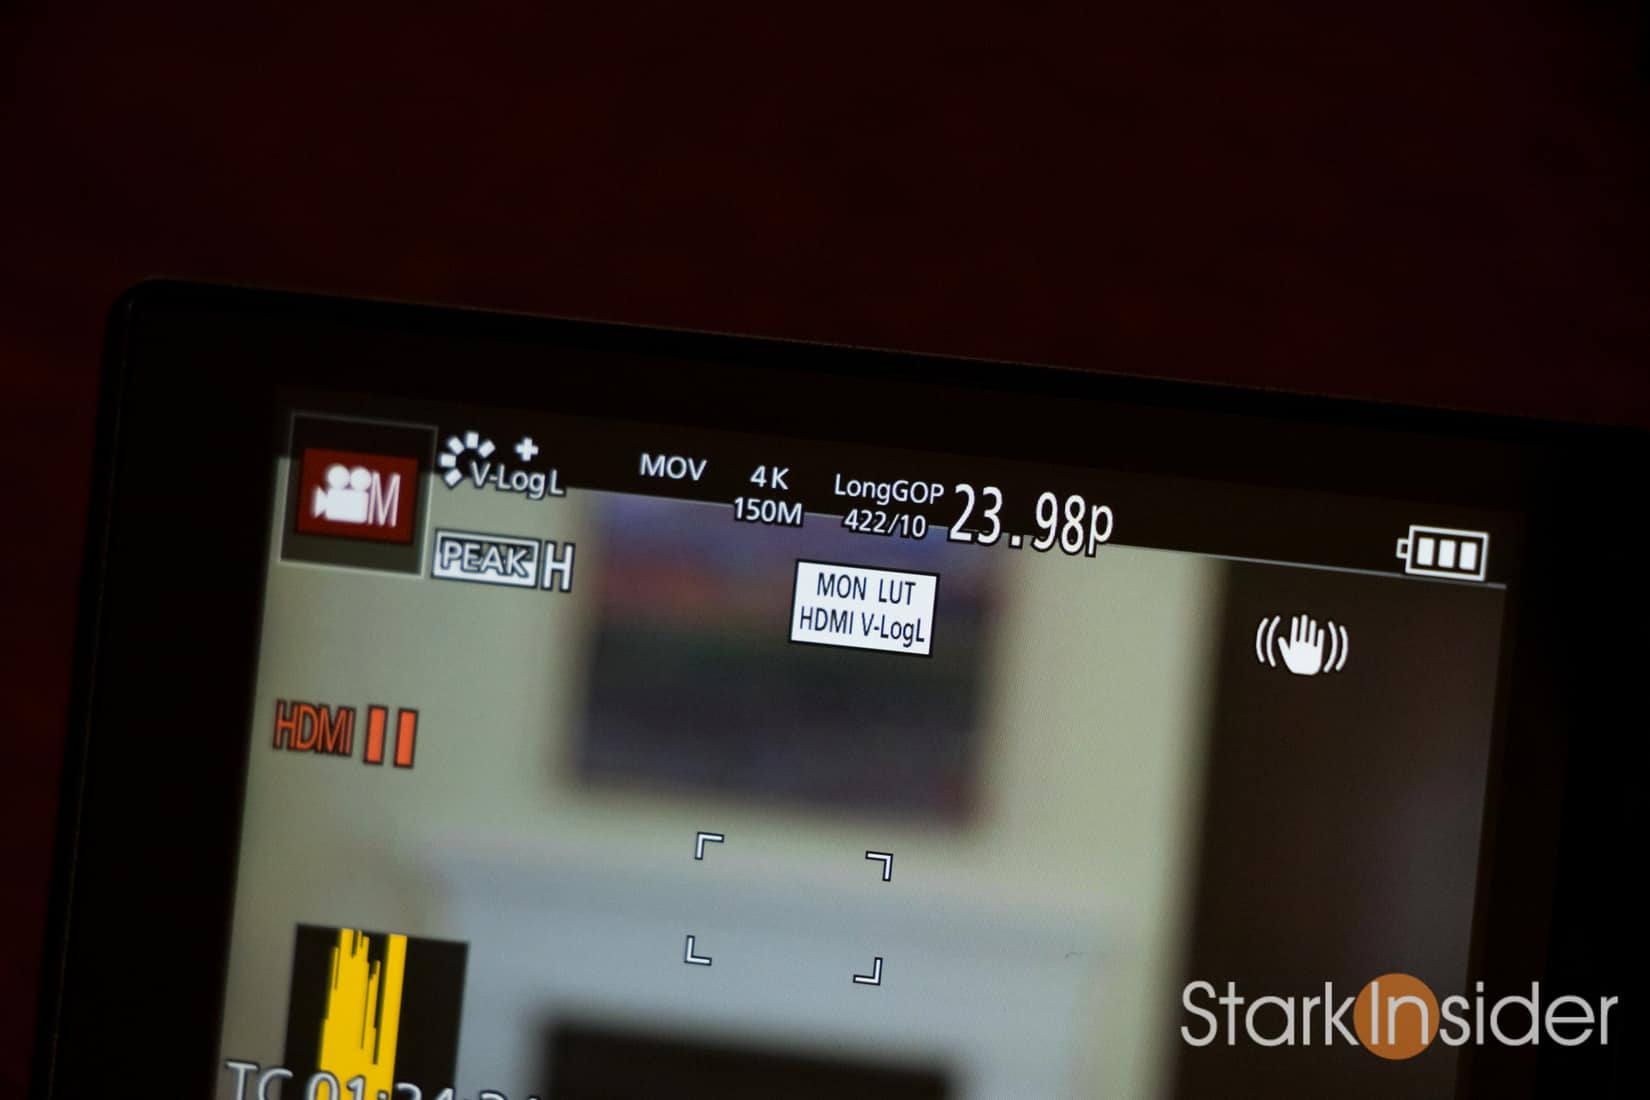
2. Activate VLOG LUT for in-camera monitoring (V-LogL View Assist)

If you’re serious about video, you’ll likely want to shoot VLog (the picture profile is a $99 add-on, but in my view essential for video shooting). This should give you the maximum dynamic range out of the GH5’s 20MP Micro Four Thirds sensor.
Selecting VLog as a picture profile will give you a flat image. This is great for post-production workflow and color grading. However, because there is so little contrast, it can be tricky to properly monitor the image and focus while recording. There’s an easy solution. Panasonic provides a VLog to rec709 LUT. Even better, you can activate it in-camera. Then whatever you’re looking at on the LCD will already have the LUT (Look-up Table) applied as a real-time in-camera preview.
Here’s how to enable GH5 in-camera LUT monitoring:
- Make sure your GH5 is in creative Movie mode (top right dial set to movie camera with M) and photo style is set to “V-LogL”
- Go to menu 1 (the movie camera icon with M)
- Go to page 2/2
- Select “V-LogL View Assist”
- Select “LUT Select”
- Then choose “Vlog_709”
- Ensure the last option “LUT Monitor Display” is set to “ON”
After following those steps you should see a more contrasty image on the LCD. The 709 LUT is now being applied to the LCD image.
Note that the recorded image is still unprocessed VLog video. In post-production you can, of course, apply the official LUT (.cube file) available on the Panasonic web site. Or, you can use FilmConvert which has a GH5 profile or any other LUT of your choosing — such as the popular Lemming LUT One.
3. Save personal settings to a custom mode (C1/C2/C3)
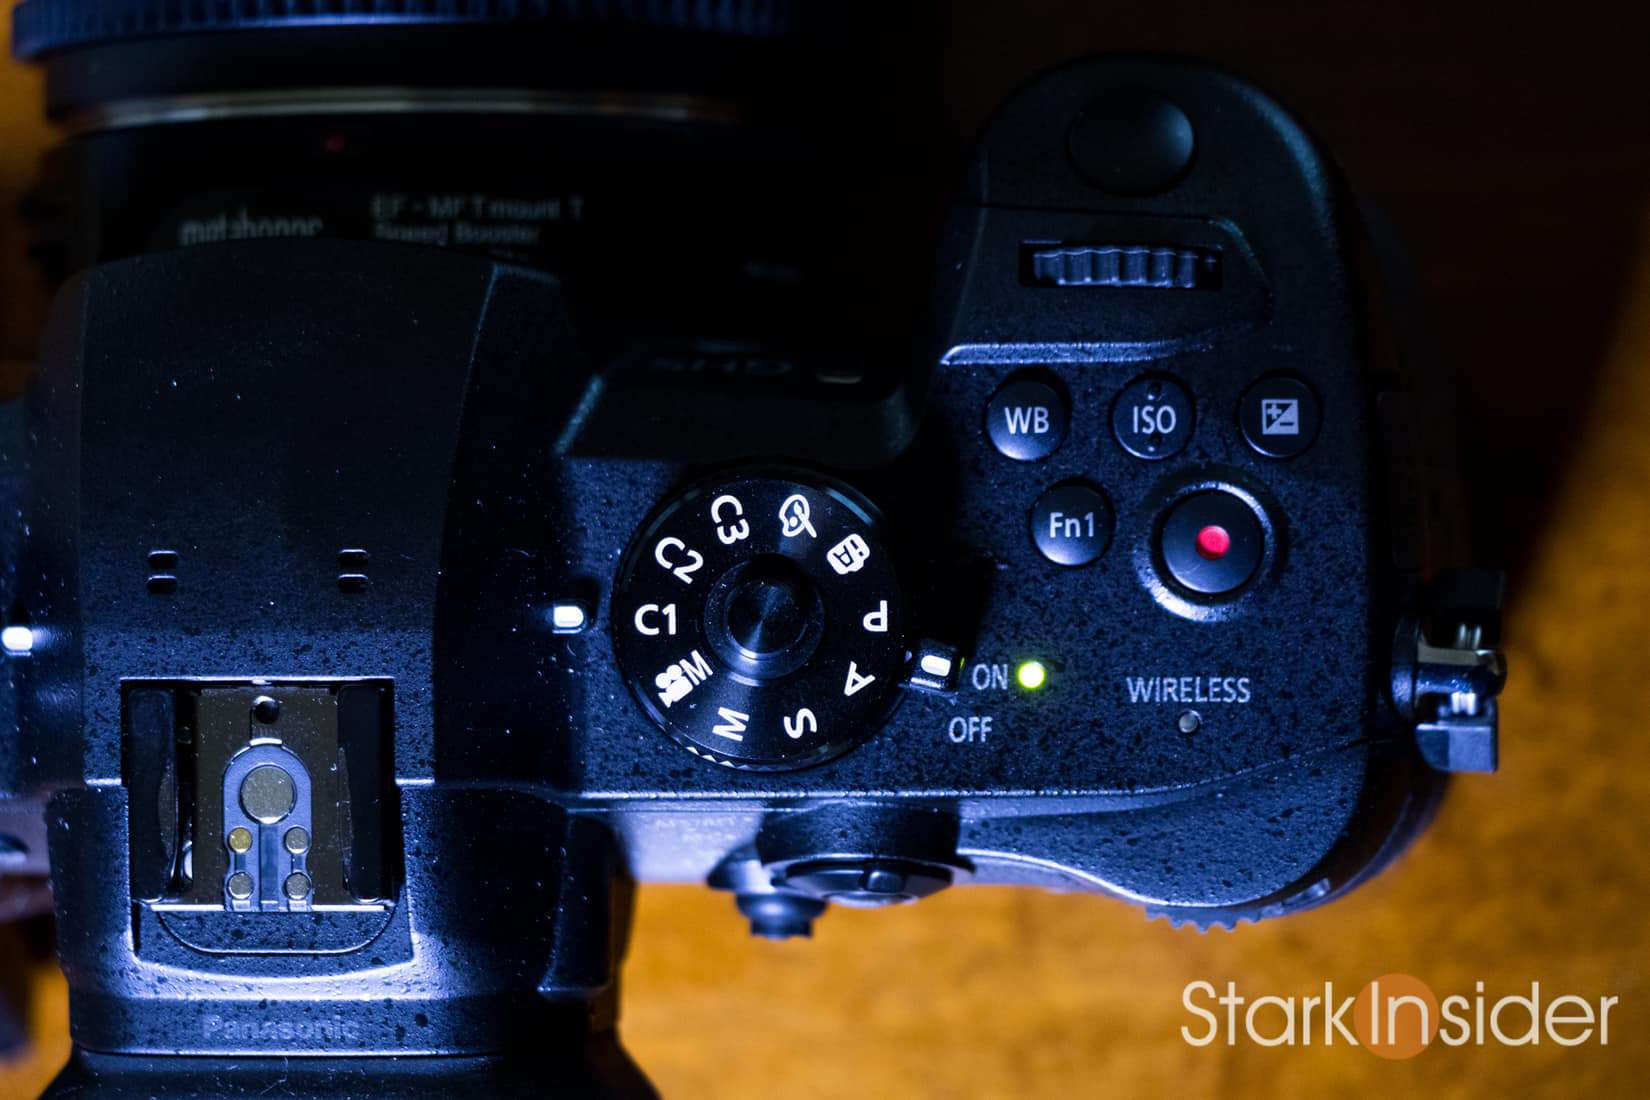
The GH5 is highly customizable. For instance you can manually define any of the 20 on-camera body buttons (including the joystick and rear dial). In addition there are 4 soft on-screen buttons (Touch Tab). There’s more too. On the mode dial you’ll see five custom modes: C1, C2, C3-1, C3-2, C3-3. Each of these modes can be configured however you like. Then, when you’re in the field you can rapidly change modes without having to dive through the menus.
Here’s how to configure (“register”) a custom mode to store your personal settings:
- Configure settings in the menu to taste (i.e. record quality, frame rates, etc.)
- Go to the wrench menu (fourth from top)
- On page 1/4 select “Cust Set Mem.”
- Select one of the five custom modes to program
- It will ask you to confirm to overwrite
- Once complete almost all of the camera settings will be saved to that custom mode
To record using the registered settings simply set the mode dial (top right) to C1, C2 or C3.
Note there are a few settings that are not customizable to a C button (rotate display, profile setup and a few others). You can find this short list of exceptions on page 84 of the DC-GH5 Advanced Operating Manual (a whopping 348 pages!).
Hint: use the custom buttons to store your favorite slow motion VFR (variable frame rate) modes. And also 1080p and 4K recording modes. Rotating the dial makes it a breeze to rapidly change to your desired shooting settings.
4. Setting focal length with a Metabones Speedbooster for most effective IBIS
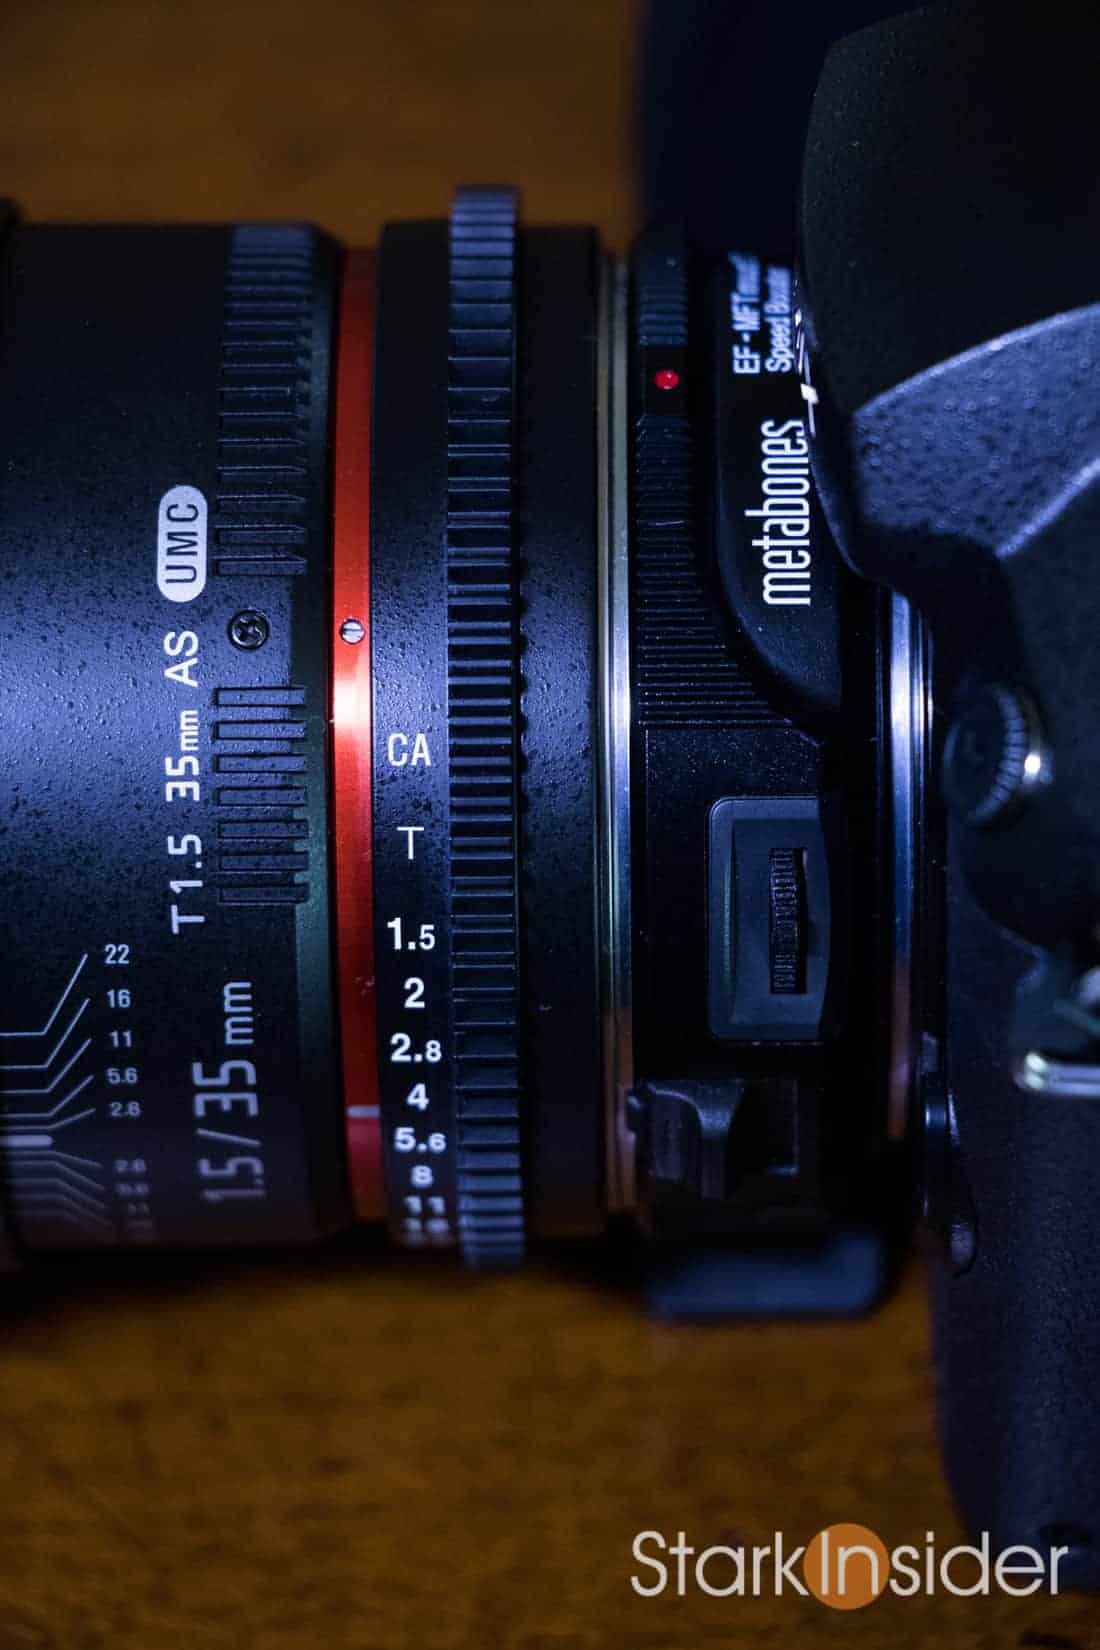
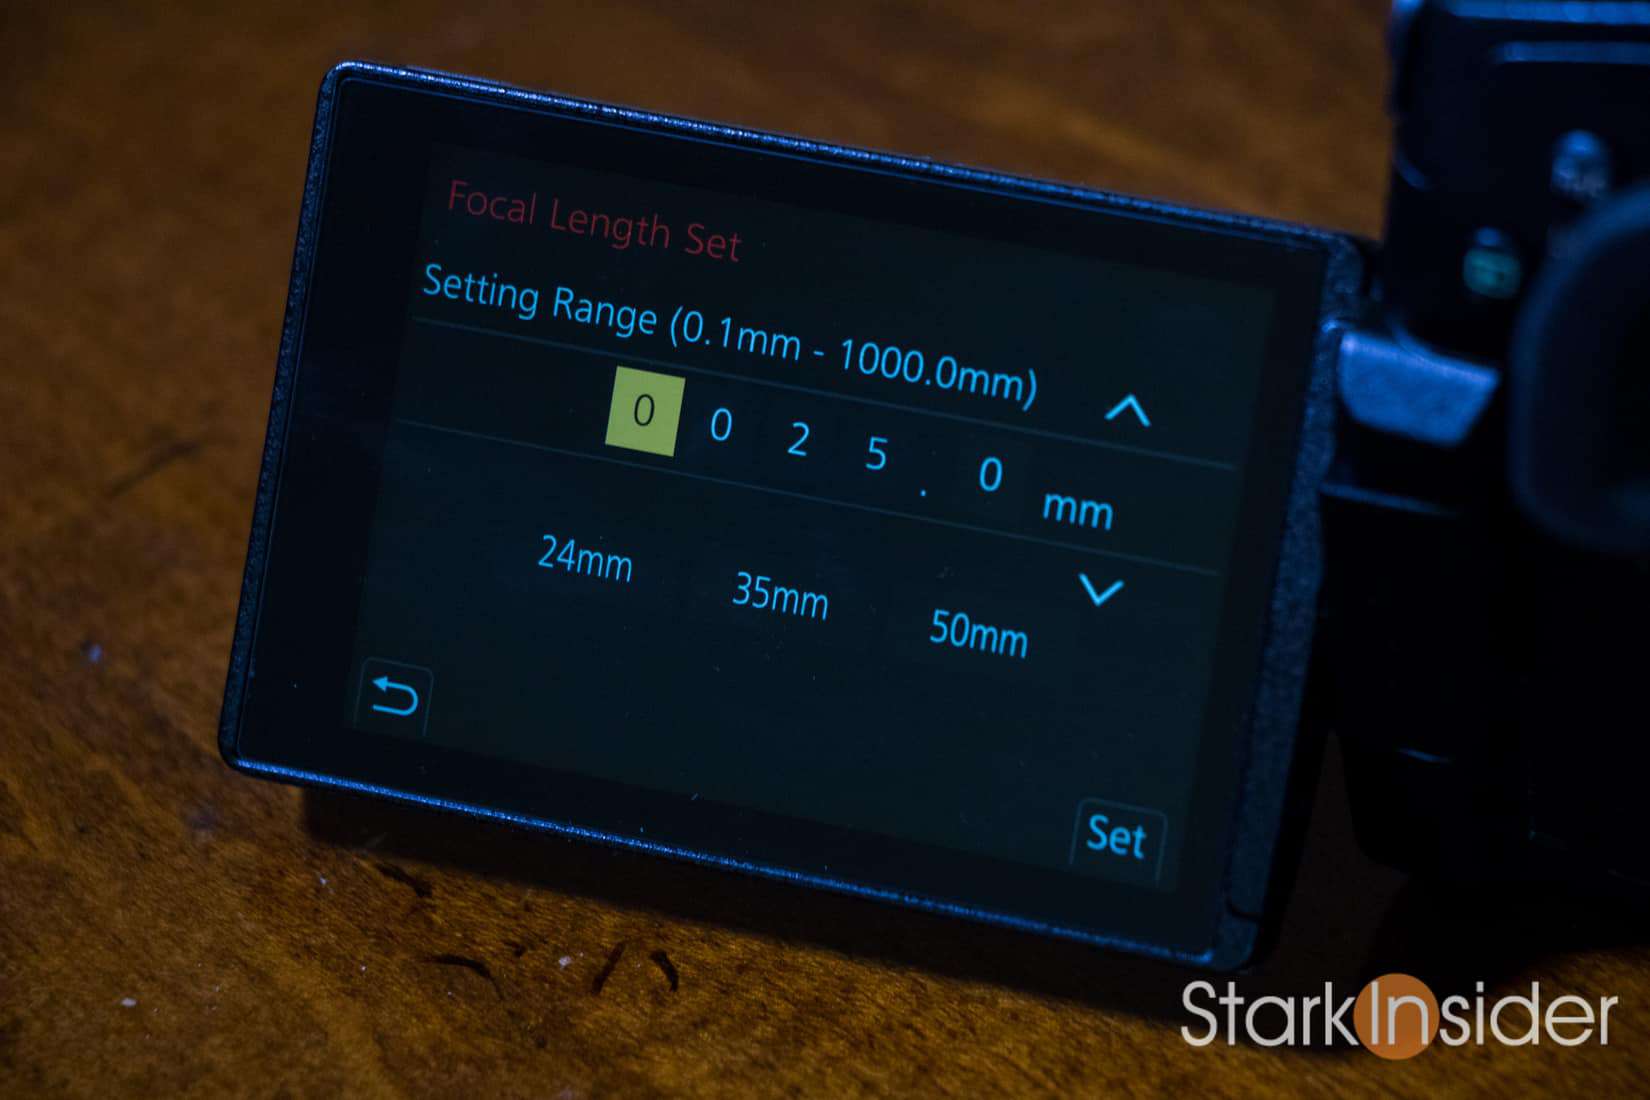
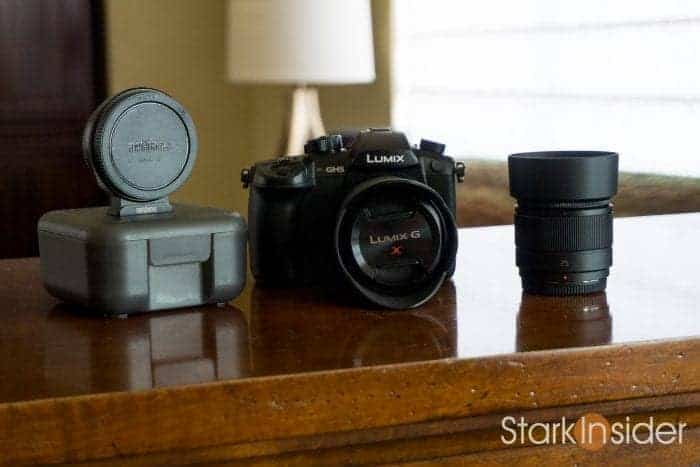
If you’re like me, you’ve invested in Canon EF mount lenses. And, likely are using a Metabones Speedbooster with the GH5 (I use the Ultra .71 EF-MFT).
When using the Speedbooster, you’ll get prompted to enter a focal range when the camera is turned on (as far as I know there’s no way to disable this message). This is so the GH5 can optimize its IBIS algorithm. It’s based on focal length. Unlike a native MFT lens it doesn’t automatically know the focal length of the lens attached to the Metabones adapter. You need to tell it. Here’s the formula to use:
- Multiply the lens focal length by .71
- Enter that value when you first turn on the camera (it will indicate the current focal length setting and ask if you’d like to change the setting)
- Press Set
For example, on a Rokinon 35mm prime, you’d enter 25mm (35mm x 0.71).
Now you should get optimal IBIS for your particular lens.
Panasonic Lumix
GH5, GH6, GH7:
Resource Guide
Useful links and sites that should be of interest to new GH5 shooters or those researching the camera market to make their next purchase decision.
GH5 Operating Manuals (PDF):
Go to the Panasonic GH5 web page and click on “Support”. You” see a Quick Guide, and Basic and Advanced operating manuals in English and Spanish. Download on Stark Insider: Panasonic Lumix GH5 Basic Owner’s Manual (PDF)
Panasonic VLog to 709 LUT Files:
Download LUT files (.cube files for use in editing software such as Final Cut Pro and Adobe Premiere Pro) from this Panasonic web site.
GH5 Tutorials and How-to Videos:
Look to the LUMIX Cameras YouTube channel for a bunch of short, helpful videos on configuring and using your GH5.
Buy/Research the Panasonic Lumix GH5:
Panasonic GH5 4K Mirrorless Camera: Deals on Amazon
5. Enable Video-Priority Display
Video-Priority Display is an option that displays details of the current record settings at the top of the LCD. If you primarily shoot video this can be very handy. By default the option is set to off. I recommend turning it on. Here’s how:
- Go to the wrench with the C (third menu from the top)
- Select “Monitor/Display”
- Select “Video-Priority Display”
- Set to on
Now you’ll see even more detail (at top middle of LCD display) about the camera’s current record settings. This is particularly useful if you frequently switch between VFR and 4K/1080p.
Shooting Video with the GH5: More to come
I plan to keep sharing quick tips, things I learn, and even post some short films shot on the GH5 as I continue to work with the camera for Stark Insider over the coming weeks.
So far I’m very impressed. Aside from auto-focus performance that (significantly) lags competitors such as the Canon EOS 80D and Sony a6500, I think Panasonic has nailed it. There’s no other way to describe the overall GH5 package other than phenomenal.
More to come here on Stark Insider, including: working with external recorders such as the Atomos Ninja Blade (works, but only in 1080p) and the new Ninja Inferno (also works including rec start/stop), cinema lenses and stabilization, focusing tips and tricks, recommended accessories and lens, thoughts on ND filters, among several other topics.
I hope these 5 quick tips help you learn more about the truly impressive Panasonic GH5 and get you up-and-running as efficiently as possible.
As always, remember this is just a tool. Just another tool in our basket of things that enable us to be creative… or at least try! Just about everything else is more important than the camera itself: composition, lighting, acting if applicable, sets, production design, food (!). Above all else: story-telling.
Have at it. I look forward to sharing more soon.
Happy shooting!
Who is Clinton Stark? If you’re interested to know more about me here’s my gear page which also includes my unsolicited thoughts on why those starting out shouldn’t just go buy every piece of cool camera kit under the sun.
Buy and Research the Panasonic GH5/GH6/GH7: