UPDATE 3.24.2012 – I’ve updated the instructions. (1) After rooting S2 using first 5 steps below, you can do the rest by installing “ROM Manager” (no affiliation) from Google Play. It’s highly recommended (4.5/5 stars, 3M+ downloads), and will allow you to install ICS on your S2 without needing a PC. It will backup your current ROM, download the CyanogenMod ICS ROM (or others if you wish) and install; (2) After installing ICS, you’ll need to flash “Google Apps” separately. It’s very easy to do. Again you can use process below, or use ROM Manager which will conveniently do it for you. Good luck. Final tip: review comments below.
Want to get Ice Cream Sandwich on to your Samsung Galaxy S II right now? Here’s a cheat sheet that will show you how to do it.
There’s a lot of helpful forums out there. I searched long and hard, and found many useful tips and tricks to get ICS loaded onto the S II. Being my first time, though, I didn’t understand a lot of the acronyms and language being used to describe the process. So what I’m doing here is writing a “cheat sheet” that is hopefully easy to follow and written (as much as possible) in straight forward language. Note you will need some technical aptitude. However, no coding is involved. Instead, you’ll be downloading zips, transferring files to your phone, and doing a couple of reboots involving three finger gynmastics. That’s about the essence of this process.
BTW- if you don’t have an S II, you can buy the unlocked i9100 model (the same one we used to install ICS) for about $550 on Amazon. Or check eBay.
Please read this carefully. I’ve got to be very clear about one thing: know what you’re getting into here. The steps below worked for us. We upgraded from Gingerbread to Ice Cream Sandwich (and bonus: No Touchwiz) without any issues, and it works incredibly well. The updated Google Voice with call log integration works, as does the Google Chrome browser, and everything else too; bluetooth, the camera, wireless, Google Play, etc. In short, you’re going to love it.
However, fair warning: you could brick your phone.
This process I’m going to describe may or may not work, and you could end up with an expensive paperweight. Rooting and flashing, though, have been around for years on Android, and thanks to its open nature this stuff is becoming more reliable, and less risky. But fair warning. Take a long hard look at your S II, and make sure you feel comfortable proceeding. There could be mistakes in my instructions below, or there could be things I have not described properly.
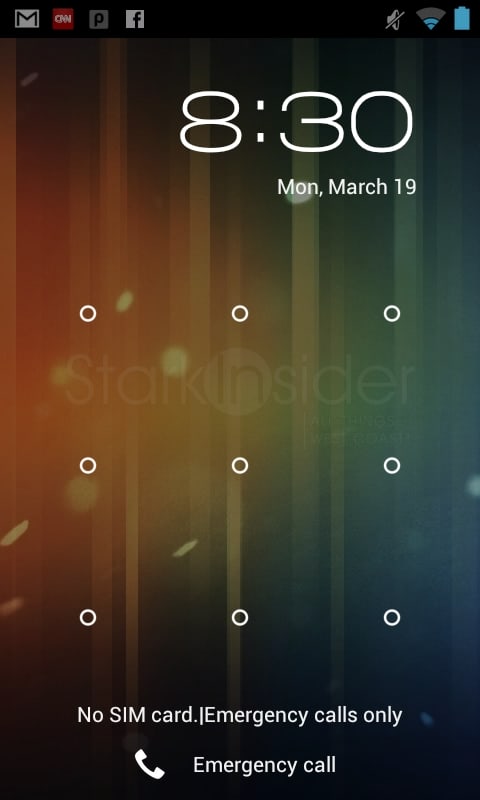
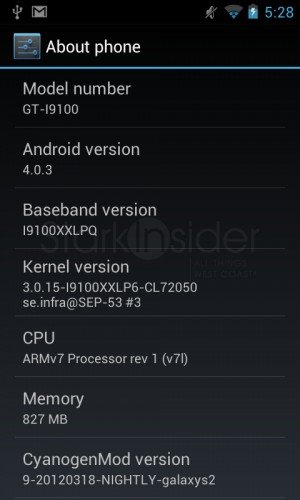
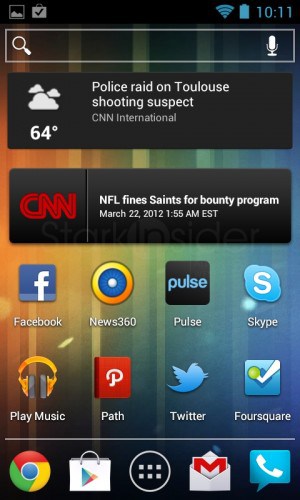
Also note: this is for the international unlocked version of the Samsung Galaxy S II, the GT-I9100. To tell which model you have, go to settings -> about. Scroll down until you see the model number. Here’s how the S II looks after the upgrade to ICS:
You’ll be running Android 4.0.3 based on CyanogenMod – a rom built from the Galaxy Nexus, or so I’m told. If you have an AT&T S II or some other variant, this may or may not work, and I’d advise you to go to the xda-developers forum for more information.
Okay, ready? Take a deep breath.
Here’s the short version of what we’re going to do – and this entire process should take under 30 minutes, maybe even less if you can download the necessary files fast enough.
What you need:
- Samsung Galaxy S II unlocked, international version (GT-I9100)
- Windows computer (we used Win 7)
- A micro-USB cable
Summary:
- Preparation – download necessary files, ensure S II drivers are installed on your PC so you can transfer files to the phone.
- Root – run a .bat script which will give superuser access, granting necessary rights to update system files.
NOTE: at this point you can proceed with the rest of these instructions, or an even easier method is to download the superb “ROM Manager” from Google Play and use it to flash ClockworkMod Recovery, then the ICS ROM – all without having to use a PC.
- Install ClockworkMod Recovery – a handy utility that sits on your S2 for flashing roms, backing up files, and rebooting the phone.
- Backup existing rom – using ClockworkMod for fallback if something goes wrong.
- Install Ice Cream Sandwich – I used an ICS ROM by CyanogenMod and find it stable, fast. You can, of course, flash any number of others out there, including the official Samsung OTA ICS rom which is rolling out currently in Europe. As an optional final step you’ll install Google Apps which are the official Google apps that ship with Android.
Read that through. Make sure you’re ready. Shutdown Twitter clients, focus. Try not to do this while sipping gin, or downing peach schnapps shots.
Here is the long version. Follow this step by step:
** WARNING **
We are not liable for any damages, loss of data or other harm caused by the below process. There are no warranties or guarantees, implied or otherwise. Proceed at your own risk.
How to Install Ice Cream Sandwich on your Samsung Galaxy S II
PREPARATION:
1. Download files
Download these 3 zip files (the fourth may not be needed) and place them into a folder on your PC (reminder these are for the GT-I9100 international, unlocked version of the S2):
- GalaxyS2RootNew: (a script that will automatically root the phone)
https://downloadandroidrom.com/file/GalaxyS2/rooting/GalaxyS2RootNew.zip
- GalaxyS2Recovery: (includes Odin v1.85 for flashing the included ClockworkMod ROM utility) ** NOTE: We’re linking to v4.0.1.4 of ClockwordMod as the newer v5.5.0.4 version you see below in the instructions is apparently not quite as stable, though it worked fine for us **
https://downloadandroidrom.com/file/GalaxyS2/rooting/GalaxyS2Recovery.zip
- CyanogenMod Ice Cream Sandwich ROM: (I recommend you choose latest build, these are robust and very impressive ROMs- check with mod community and you’ll see)
- Samsung Kies (only if necessary, wait for step 3 first to save time):
https://www.samsung.com/us/kies2. Turn on USB debugging on your S II
- Settings->Applications->Development
3. Connect the S II to your PC (again, this is for PC, not Mac)
- Go to Windows Control Panel -> Device Manager
- Look under “SAMSUNG Android Phone”
- You should see “Samsung Android ADB Interface”
- If you don’t see it, then it means you don’t have the drivers installed necessary for transferring files – in this case you need to run Samsung Kies (which you downloaded in step 1) – do that and the program will install drivers for you – re-check the control panel to ensure you see “Samsung Android ADB Interface”
- If you see “Samsung Android ADB Interface” you can go to the next step
ROOT:
4. Unzip GalaxyS2RootNew.zip
- With your S II still connected to your PC, run “runme.bat”
- This will take about 5-10 minutes and will automatically root your phone
- Rooting simply gives superuser access to system files – this is necessary in order to update them/replace them with new files
- Your phone will reboot when done
- When it’s complete you’ll want to ensure the root was successful
- To do this, look for a new app called “Superuser” on the phone
- A window will pop up and you’ll click “Allow” – this will test that system files can be changed as required
- Your phone is now rooted
5. Disconnect your phone and power it down
NOTE AGAIN: Now that you’ve rooted your S2 i9100, at this point you can proceed with the rest of these instructions, or an even easier method is to download the superb “ROM Manager” from Google Play and use it to flash ClockworkMod Recovery, then the ICS ROM – all without having to use a PC.
INSTALL CLOCKWORKMOD RECOVERY:
Now you’re going to reboot the S II into “download” mode which will enable you to flash ClockWorkMod Recovery, a nice utility that will sit on your phone and allow you to make backups, flash ROMs, and perform other useful functions.
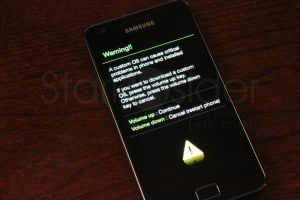
6. Hold down VOLUME DOWN + HOME BUTTON + POWER BUTTON simultaneously until your phone reboots and shows a screen with “Warning!!” at the top. Let go of the buttons. This is “download” mode. Now push VOLUME UP to continue, and reconnect your phone to the PC. Don’t forget: you’ve been warned Bond-san.
7. Unzip GalaxyS2RootRecovery.zip – then run the Odin program file (odin3 v1.85exe) and verify that your phone is recognized via the yellow square “COM” on the left side of the interface. Odin enables you to flash updates to your phone’s system. Because you are now rooted, you have full rights to make the required changes to system files. In this case we want to install ClockworkMod Recovery onto the S2.
8. Click the PDA button and locate the GT_I9100_ClockworkMod-Recovery_4.0.1.4.tar file from your downloaded files folder. Hit Start. Your phone will get flashed, and will reboot. You will see a yellow exclamation on your startup screen. Don’t panic. This is normal. Disconnect the phone from the PC.
BACKUP EXISTING ROM
Now you’re going to reboot into ClockworkMod Recovery, the utility we just installed, so you can backup your current ROM and then flash ICS.
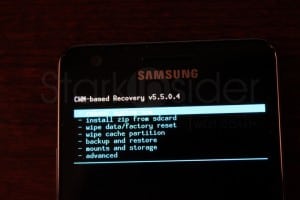
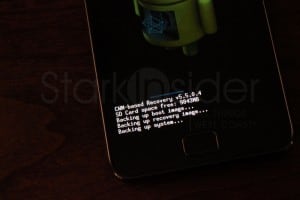
9. Hold VOLUME UP + HOME BUTTON + POWER BUTTON. Wait, the phone may cycle the Samsung logo a few times. You should see a blue text menu titled: “CWM-based Recovery v5.5.0.4”
10. Scroll down using VOLUME DOWN to “backup and restore” and click the POWER button.
11. Choose “backup” in the following menu by again clicking the POWER button.
The ROM will be backed up and stored in a backup directory on your phone under “clockworkmod” – this is a complete backup of the system, including all your apps. It’s a snapshot of your entire system, and peace of mind. The file will be time stamped, but can rename it later using file explorer. I also recommend you save it to your computer as well. FYI, my Gingerbread backup was 894MB and consisted of 5 image files (boot.img, cache.img, data.img, recovery.img, system.img).
12. Chose “reboot system now” after backup is completed.
Okay, almost there. Now the fun part…
INSTALL ICE CREAM SANDWICH ROM
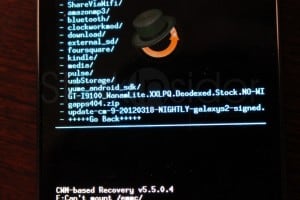
13. Re-connect your phone and copy over the CynanogenMod ICS ROM you downloaded to your PC in step 1 (disable USB debugging so you can copy files). It will look something like this: update-cm-9-20120318-NIGHTLY-galaxys2-signed.zip. If you downloaded a more recent build, obviously the file name will be different. You don’t need to unzip this file. Just copy over the ICS ROM zip to the root directory on the S II (not the sdcard).
14. Unplug your S2 and reboot into recovery mode by holding down VOLUME UP + HOME BUTTON + POWER BUTTON.
15. First select “wipe data/factory reset” to clean the phone (again: volume for up/down, and power to select).
16. On the next menu, click “choose zip from internal sdcard”.
17. Scroll down to the zip file you just copied over, and click POWER, the “yes” to confirm and the process will begin. The new ROM will install, and the phone will reboot when done.
18. Welcome to ICS!
You should be prompted by the much-loved Android start screen. It will walk through the ICS set-up as if you are configuring a new phone (and in some ways you are).
19. Optional: download and install Google Apps zip file to get Google account, apps.
From the CyanogenMod wiki: “Google Apps contain the proprietary Google applications that come pre-installed with most android devices. Due to licensing restrictions, these apps cannot come pre-installed with CyanogenMod and must be installed separately. CyanogenMod does not require Google Apps to function properly, however, to take full advantage of the Android system, Google Apps are recommended. These apps include Gmail, Maps, and the Android Market, just to name a few.”
Link for Google Apps: https://wiki.cyanogenmod.com/index.php?title=Latest_Version#Google_Apps
For this tutorial you want the latest which is for “CyanogenMod 9” (often referred to as CM9)
RESOURCES
Here are three of the very best resourses I could find. Without these I would not be able to install ICS on my S2.
GalaxyS2root.com
This guy is great. He’s published several highly informative videos, and step-by-step instructions. Excellent place to look for in-depth information on flashing, backing up your phone, the latest rom reviews, and more. Geek heaven.
xda-developers
Massive amount of information, and the defacto source of all things Android development. Here’s a direct link to the S2 i9100 ROM forum.
CyanogenMod
The best ROMS out there, including the stable ICS ROM (CM9) we show you how to install above.
** WARNING **
We are not liable for any damages, loss of data or other harm caused by the above process. There are no warranties or guarantees, implied or otherwise. Proceed at your own risk.

